HTML(HyperText Markup Language)是超文本标记语言,是用来描述网页的一种标记语言。
简介 实例解析 这是一个标准的html实例:
1 2 3 4 5 6 7 8 9 10 11 12 13 14 15 16 17 18 19 20 21 22 23 24 25 26 <!DOCTYPE html > <html lang ="en" > <head > <meta charset ="UTF-8" > <meta name ="viewport" content ="width=device-width, initial-scale=1.0" > <title > 标题</title > </head > <body > <h1 > 一级标题</h1 > <h2 > 二级标题</h2 > <h3 > 三级标题</h3 > <p > 段落</p > </body > </html >
将上面的代码保存为 .html 或者 .htm 文件即可在浏览器运行, .htm 扩展名和前者没有区别。
基本概念
一个html标签的基本结构是这样的: <tagName>content</tagName>
html元素和标签是一个概念。
web浏览器是用于读取html/css/js等静态文件的,用于web页面展示。
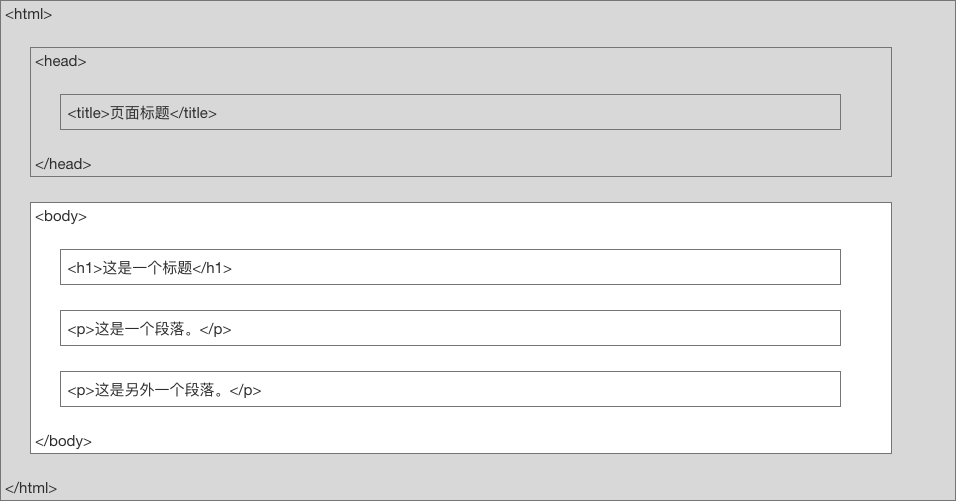
文档结构 这是一个基本的html页面结构:
文档声明 1 2 3 4 5 6 7 8 <!DOCTYPE html > <!DOCTYPE HTML PUBLIC "-//W3C//DTD HTML 4.01 Transitional//EN" "http://www.w3.org/TR/html4/loose.dtd" > <!DOCTYPE html PUBLIC "-//W3C//DTD XHTML 1.0 Transitional//EN" "http://www.w3.org/TR/xhtml1/DTD/xhtml1-transitional.dtd" >
文档编码 统一使用utf-8既可:
1 2 <meta charset ="UTF-8" > <meta charset ="utf-8" >
编辑器
vscode(免费)
sublime text(收费,按年付费)
vi/vim
emacs
可以使用emmet插件提高编码速度。
基础 标题 html标题有h1到h6
1 2 3 <h1 > 这是一个标题</h1 > <h2 > 这是一个标题</h2 > <h3 > 这是一个标题</h3 >
段落 链接 1 <a href ="https://herotiga.github.io/" > 我的博客</a >
图像 1 <img loading ="lazy" src ="/images/logo.png" width ="640" height ="320" />
元素 html文档由html元素定义。
元素由起始标签和闭合标签组成,他们之间有内容。
有一些html元素内容为空。
空元素在开始标签中关闭: <br /> 。
大多数元素可以有属性。
嵌套 html元素可以互相嵌套,html文档本身也是由互相嵌套的html标签组成。
空元素 没有内容的元素称之为空元素,空元素在开始标签中进行关闭。
关闭空元素的正确方法:比如 <br /> ,先敲一个空格再敲一个斜杠。
大小写标签 html大小写不敏感,不过推荐全小写。
属性 html属性是元素的附加信息。
html元素可以设置属性。
属性可以给元素附加信息。
属性描述于开始标签。
属性和属性值以name=”value”的形式出现。
属性和属性值也要采用小写。
属性实例 href 就是a标签的一个属性, https://herotiga.github.io/ 就是这个属性的值。
1 <a href ="https://herotiga.github.io/" > 我的博客</a >
属性值要放在引号中,单引号双引号都可以,如果属性值含有引号则属性值要用另一个引号,比如:
其他属性 class,id,style,title这几个是几乎所有的标签都拥有的属性。
标题 html标题从大到小依次是h1-h6,这个次序也是最重要到最不重要。
标题元素只能用于标题,不能为了生成大号字体而使用,因为搜索引擎使用标题来索引网页内容。
水平线 1 2 3 <p > 1</p > <hr /> <p > 2</p >
注释 查看源码 右击网页,点击查看源文件、源代码既可。
段落 html将文档分为若干个段落。
p标签:
换行 1 <p > 第一行<br > 第二行<br > 第三行</p >
空行和空格 浏览器解析html代码的时候,会将连续的空格或者空行压缩为一个空格。
文本格式化 1 2 3 4 5 6 7 8 9 10 11 12 13 14 15 16 17 18 19 20 21 22 23 24 25 26 27 28 29 30 31 <b > 加粗</b > <strong > 突出显示</strong > <i > 斜体</i > <em > 强调</em > <code > 电脑输出</code > <sub > 下标</sub > <sup > 上标</sup > <big > 大字体</big > <small > 小字体</small > <pre > 预格式化文本</pre > <code > 计算机输出</code > <kbd > 键盘输入</kbd > <tt > 打字机文本</tt > <samp > 计算机代码样本</samp > <var > 计算机变量</var > <address > Written by <a href ="mailto:webmaster@example.com" > Mason</a > .<br > Visit us at:<br > Example.com<br > Box 564, Disneyland<br > USA </address > <abbr title ="全写" > 缩写</abbr > <acronym title ="World Wide Web" > WWW</acronym > <bdo dir ="rtl" > 文字从右到左显示。</bdo > <q > 短引用</q > <blockquote > 长引用</blockquote > <del > 删除线</del > <ins > 插入文本</ins > <cite > 引用源</cite > <dfn > 定义一个定义项目</dfn >
为了将语义和样式分离开,b和i现在不用了,使用strong代替b,使用em代替i。strong和em的样式交由css。
链接 链接的作用是从一个页面跳转到另一个页面或者本页面的一个锚点。
代码:
1 <a href ="https://baidu.com/" > 百度</a >
target属性可以定义连接的打开方式:
1 <a href ="https://baidu.com/" target ="_blank" > 百度</a >
id属性可以在文档中创建锚点:
1 2 3 4 5 6 7 8 9 <a id ="tips" > 锚点</a > <a href ="#tips" > 指向锚点的连接</a > <a href ="https://www.runoob.com/html/html-links.html#tips" > 指向另一个页面的锚点</a >
tips:/ 加入到url目录的后面:
1 2 3 <a href ="https://herotiga.github.io/" > </a > <a href ="https://herotiga.github.io/categories/" > </a > <a href ="https://herotiga.github.io/tags/" > </a >
如果不加斜杠就会向服务器产生两次http请求,加上斜杠则只会产生一次http请求。
图片连接:
1 2 3 <a href ="#" > <img src ="example.jpg" > </a >
创建邮件链接:
1 2 3 4 <a href ="mailto:someone@example.com?Subject=Hello%20again" target ="_top" > 点击发送邮件</a > <a href ="mailto:someone@example.com?cc=someoneelse@example.com&bcc=andsomeoneelse@example.com&subject=Summer%20Party&body=You%20are%20invited%20to%20a%20big%20summer%20party!" target ="_top" > 发送邮件!</a >
头部 头部head元素包含了一些元素,比如style,script,meta,title等等。
title
title元素定义了文档的标题,它会出现在浏览器的标签上。
title元素在html/xhtml文档中是必须的。
title还可以在左边显示logo等等。
1 2 3 4 <head > <link rel ="shortcut icon" href ="url" > <title > 这是一个带图片的标签</title > </head >
base base元素定义了基地址,它会作为文档中所有链接的默认链接地址。
1 <base href ="https://herotiga.github.io/" target ="_blank" >
link link元素定义了文档和外部资源的关系。
1 <link rel ="stylesheet" type ="text/css" href ="style.css" >
style 定义了文档的样式
1 2 3 4 5 6 7 8 9 <style type ="text/css" > body { background-color: yellow; } p { color: blue; } </style >
meta定义了一些基本的元数据,通常用于指定网页的描述,关键词,文件的最后修改时间,作者,和其他元数据。
meta放置在head中。
1 2 3 4 5 6 7 8 9 10 11 <meta name ="keywords" content ="HTML, CSS, XML, XHTML, JavaScript" > <meta name ="description" content ="免费 Web & 编程 教程" > <meta name ="author" content ="Runoob" > <meta http-equiv ="refresh" content ="30" >
script script标签用于加载js脚本。
样式 css(层叠样式表)用于渲染html的样式。
如何使用css
内联样式:在标签中使用style属性。
内部样式表:在head中用style标签包含css代码。
外部引用:在head中使用link引入外部样式表。
tips:最好使用外部引入css。
内联样式 实例1:
1 <p style ="color: red;padding: 2px 4px;" > 红色字体,带有内边距</p >
实例2:
1 2 3 4 5 6 <body style ="background-color:yellow;" > <h2 style ="background-color:red;" > 这是一个标题</h2 > <p style ="background-color:green;" > 这是一个段落。</p > </body >
内部样式表 1 2 3 4 5 6 7 8 9 10 11 <head > <style type ="text/css" > body { background-color: yellow; } p { color: blue; } </style > </head >
外部样式表 1 2 3 <head > <link rel ="stylesheet" type ="text/css" href ="style.css" > </head >
已经弃用的标签和属性 不建议使用的标签:
不建议使用的属性:
图像 基本用法 图像由img标签定义,url由src定义。
map标签用于定义图像地图
area标签用于定义图像地图中的可点击区域
指定图像的高和宽是哥好习惯,页面会在加载的时候预留指定尺寸的空间。
1 <img src ="" alt ="替换文本" width ="480" height ="360" >
提示
表格 表格组成 表格由table标签定义,tr(表格行)定义表格的一个行,每一行分为若干个单元格,单元格有th(表格表头单元)和td(表格数据单元)组成,单元格里面可以有文本、图片、列表、段落、表单、水平线、表格等等。
实例:
1 2 3 4 5 6 7 8 9 10 <table border ="1" > <tr > <td > row 1, cell 1</td > <td > row 1, cell 2</td > </tr > <tr > <td > row 2, cell 1</td > <td > row 2, cell 2</td > </tr > </table >
表格边框 给表格一个边框:
1 2 3 4 5 6 <table border ="1" > <tr > <td > Row 1, cell 1</td > <td > Row 1, cell 2</td > </tr > </table >
表格表头 使用th标签定义表头。
1 2 3 4 5 6 7 8 9 10 11 12 13 14 <table border ="1" > <tr > <th > Header 1</th > <th > Header 2</th > </tr > <tr > <td > row 1, cell 1</td > <td > row 1, cell 2</td > </tr > <tr > <td > row 2, cell 1</td > <td > row 2, cell 2</td > </tr > </table >
实例
1 2 3 4 5 6 7 8 9 10 11 12 13 14 15 16 17 18 19 20 21 22 23 24 25 26 27 <h4 > 这个表格没有边框:</h4 > <table > <tr > <td > 100</td > <td > 200</td > <td > 300</td > </tr > <tr > <td > 400</td > <td > 500</td > <td > 600</td > </tr > </table > <h4 > 这个表格没有边框:</h4 > <table border ="0" > <tr > <td > 100</td > <td > 200</td > <td > 300</td > </tr > <tr > <td > 400</td > <td > 500</td > <td > 600</td > </tr > </table >
1 2 3 4 5 6 7 8 9 10 11 12 13 14 15 <table border ="1" > <caption > Monthly savings</caption > <tr > <th > Month</th > <th > Savings</th > </tr > <tr > <td > January</td > <td > $100</td > </tr > <tr > <td > February</td > <td > $50</td > </tr > </table >
1 2 3 4 5 6 7 8 9 10 11 12 13 14 15 16 17 18 19 20 21 22 23 24 25 26 27 <h4 > 单元格跨两列:</h4 > <table border ="1" > <tr > <th > Name</th > <th colspan ="2" > Telephone</th > </tr > <tr > <td > Bill Gates</td > <td > 555 77 854</td > <td > 555 77 855</td > </tr > </table > <h4 > 单元格跨两行:</h4 > <table border ="1" > <tr > <th > First Name:</th > <td > Bill Gates</td > </tr > <tr > <th rowspan ="2" > Telephone:</th > <td > 555 77 854</td > </tr > <tr > <td > 555 77 855</td > </tr > </table >
1 2 3 4 5 6 7 8 9 10 11 <h4 > 有单元格边距:</h4 > <table border ="1" cellpadding ="10" > <tr > <td > First</td > <td > Row</td > </tr > <tr > <td > Second</td > <td > Row</td > </tr > </table >
1 2 3 4 5 6 7 8 9 10 11 <h4 > 单元格间距="10":</h4 > <table border ="1" cellspacing ="10" > <tr > <td > First</td > <td > Row</td > </tr > <tr > <td > Second</td > <td > Row</td > </tr > </table >
https://c.runoob.com/codedemo/3187
标签
Tag
Description
table
定义表格
th
定义表头单元
td
定义表格数据单元
tr
定义表格行
caption
定义表格标题
colgroup
定义表格列的组
col
定义用于表格列的属性
thead
定义表格的主体
tbody
定义表格的主体
tfoot
定义表格的页脚
列表 列表有有序列表(ol)、无序列表(ul)以及自定义列表(dl)。
无序列表 ul定义无序列表,列表项会以黑圆点显示。
1 2 3 4 5 <ul > <li > </li > <li > </li > <li > </li > </ul >
有序列表 ol定义有序列表,列表项前面会有有序的符号标识。
1 2 3 4 5 <ol > <li > </li > <li > </li > <li > </li > </ol >
自定义列表 自定义列表dl也是列表,不过还是项目和注释的组合。
dl以dt开始,后面是dd。
1 2 3 4 5 6 <dl > <dt > </dt > <dd > </dd > <dt > </dt > <dd > </dd > </dl >
实例
1 2 3 4 5 6 7 8 9 10 11 12 13 14 15 16 17 18 19 20 21 22 23 24 25 26 27 28 29 30 31 32 33 34 35 36 37 38 39 <h4 > 编号列表:</h4 > <ol > <li > Apples</li > <li > Bananas</li > <li > Lemons</li > <li > Oranges</li > </ol > <h4 > 大写字母列表:</h4 > <ol type ="A" > <li > Apples</li > <li > Bananas</li > <li > Lemons</li > <li > Oranges</li > </ol > <h4 > 小写字母列表:</h4 > <ol type ="a" > <li > Apples</li > <li > Bananas</li > <li > Lemons</li > <li > Oranges</li > </ol > <h4 > 罗马数字列表:</h4 > <ol type ="I" > <li > Apples</li > <li > Bananas</li > <li > Lemons</li > <li > Oranges</li > </ol > <h4 > 小写罗马数字列表:</h4 > <ol type ="i" > <li > Apples</li > <li > Bananas</li > <li > Lemons</li > <li > Oranges</li > </ol >
1 2 3 4 5 6 7 8 9 10 11 12 13 14 15 16 17 18 19 20 21 22 23 24 25 <p > <b > 注意:</b > 在 HTML 4中 ul 属性已废弃,HTML5 已不支持该属性,因此我们使用 CSS 代替来定义不同类型的无序列表如下:</p > <h4 > 圆点列表:</h4 > <ul style ="list-style-type:disc" > <li > Apples</li > <li > Bananas</li > <li > Lemons</li > <li > Oranges</li > </ul > <h4 > 圆圈列表:</h4 > <ul style ="list-style-type:circle" > <li > Apples</li > <li > Bananas</li > <li > Lemons</li > <li > Oranges</li > </ul > <h4 > 正方形列表:</h4 > <ul style ="list-style-type:square" > <li > Apples</li > <li > Bananas</li > <li > Lemons</li > <li > Oranges</li > </ul >
1 2 3 4 5 6 7 8 9 10 11 <h4 > 嵌套列表:</h4 > <ul > <li > Coffee</li > <li > Tea <ul > <li > Black tea</li > <li > Green tea</li > </ul > </li > <li > Milk</li > </ul >
1 2 3 4 5 6 7 8 9 10 11 12 13 14 15 16 <h4 > 嵌套列表:</h4 > <ul > <li > Coffee</li > <li > Tea <ul > <li > Black tea</li > <li > Green tea <ul > <li > China</li > <li > Africa</li > </ul > </li > </ul > </li > <li > Milk</li > </ul >
1 2 3 4 5 6 7 <h4 > 一个自定义列表:</h4 > <dl > <dt > Coffee</dt > <dd > - black hot drink</dd > <dt > Milk</dt > <dd > - white cold drink</dd > </dl >
区块 html可以使用div和span将元素包裹起来。
块元素 html元素大致分为块元素和内联元素。
块元素独占一行。
内联元素 内联元素不会以新的一行开始。
常见的有:b, td, a, img
div div是无语义的块容器。
span span是无语义的内联容器,用于组合行内元素。
布局 布局对网站的外观非常重要。
大多数网站可以使用div和table创建多列布局,用css对元素定位和增添其他样式。
div布局 div是用于分组html元素的无语义块容器。
实例:使用5个div创建多列布局
1 2 3 4 5 6 7 8 9 10 11 12 13 14 15 16 <body > <div id ="container" style ="width:500px" > <div id ="header" style ="background-color:#FFA500;" > <h1 style ="margin-bottom:0;" > 主要的网页标题</h1 > </div > <div id ="menu" style ="background-color:#FFD700;height:200px;width:100px;float:left;" > <b > 菜单</b > <br > HTML<br > CSS<br > JavaScript</div > <div id ="content" style ="background-color:#EEEEEE;height:200px;width:400px;float:left;" > 内容在这里</div > <div id ="footer" style ="background-color:#FFA500;clear:both;text-align:center;" > 版权 © runoob.com</div > </div > </body >
效果:
table布局 table的用途是将数据表格化呈现,table并不是布局工具!
下面的例子使用三行两列的表格 - 第一和最后一行使用 colspan 属性来横跨两列:
1 2 3 4 5 6 7 8 9 10 11 12 13 14 15 16 17 18 19 20 21 22 23 24 25 26 <body > <table width ="500" border ="0" > <tr > <td colspan ="2" style ="background-color:#FFA500;" > <h1 > 主要的网页标题</h1 > </td > </tr > <tr > <td style ="background-color:#FFD700;width:100px;" > <b > 菜单</b > <br > HTML<br > CSS<br > JavaScript </td > <td style ="background-color:#eeeeee;height:200px;width:400px;" > 内容在这里</td > </tr > <tr > <td colspan ="2" style ="background-color:#FFA500;text-align:center;" > 版权 © runoob.com</td > </tr > </table > </body >
效果:
提示
使用外部样式表的好处是,css都在单独的文件中,利于维护。
使用模板可以快速创建布局,通过百度搜索。
消除默认样式:
1 2 3 4 body { padding : 0 ; margin : 0 ; }
表单和输入 表单用于手机不同类型的用户输入。
表单 表单(form)是一个包含表单元素的元素。
表单元素允许用户输入各种内容:文本域textarea,下拉列表select,单选框radio,复选框checkbox。
实例:
输入元素 多数情况下输入标签是input,由type属性定义输入类型。
type有以下几类:
1 2 3 4 <form > First name: <input type ="text" name ="firstname" > <br > Last name: <input type ="text" name ="lastname" > </form >
1 2 3 <form > Password: <input type ="password" name ="pwd" > </form >
password会以圆点显示。
单选按钮,name需要一致。
1 2 3 4 <form > <input type ="radio" name ="sex" value ="male" checked ="checked" > Male<br > <input type ="radio" name ="sex" value ="female" > Female </form >
name需要一致。
1 2 3 4 <form > <input type ="checkbox" name ="vehicle" value ="Bike" checked ="checked" > I have a bike<br > <input type ="checkbox" name ="vehicle" value ="Car" > I have a car </form >
1 2 3 4 <form name ="input" action ="html_form_action.php" method ="get" > Username: <input type ="text" name ="user" > <input type ="submit" value ="Submit" > </form >
点击submit,表单的内容会被提交到action的url。
其他实例
1 2 3 4 5 6 7 8 <form action ="" > <select name ="cars" > <option value ="volvo" > Volvo</option > <option value ="saab" > Saab</option > <option value ="fiat" > Fiat</option > <option value ="audi" > Audi</option > </select > </form >
1 2 3 4 5 6 7 8 <form action ="" > <select name ="cars" > <option value ="volvo" > Volvo</option > <option value ="saab" > Saab</option > <option value ="fiat" selected > Fiat</option > <option value ="audi" > Audi</option > </select > </form >
1 2 3 <textarea rows ="10" cols ="30" > 我是一个文本框。 </textarea >
1 2 3 <form action ="" > <input type ="button" value ="Hello world!" > </form >
1 <input type ="reset" name ="button" id ="button" value ="重置" >
表单实例
1 2 3 4 5 6 7 8 <form action ="" > <fieldset > <legend > Personal information:</legend > Name: <input type ="text" size ="30" > <br > E-mail: <input type ="text" size ="30" > <br > Date of birth: <input type ="text" size ="10" > </fieldset > </form >
1 2 3 4 5 <form action ="demo-form.php" > First name: <input type ="text" name ="FirstName" value ="Mickey" > <br > Last name: <input type ="text" name ="LastName" value ="Mouse" > <br > <input type ="submit" value ="提交" > </form >
1 2 3 4 5 6 7 8 9 10 <form action ="MAILTO:someone@example.com" method ="post" enctype ="text/plain" > Name:<br > <input type ="text" name ="name" value ="your name" > <br > E-mail:<br > <input type ="text" name ="mail" value ="your email" > <br > Comment:<br > <input type ="text" name ="comment" value ="your comment" size ="50" > <br > <br > <input type ="submit" value ="发送" > <input type ="reset" value ="重置" > </form >
其他表单元素 label:定义了input的标签,并使用外框包含起来。
框架 使用框架可以在页面中显示另一个页面。
1 <iframe src ="demo_iframe.htm" width ="200" height ="200" > </iframe >
width和height默认使用px作为单位,还可以使用百分比。
移除边框:
1 <iframe src ="demo_iframe.htm" frameborder ="0" > </iframe >
使用iframe显示目标连接页面 1 2 <iframe src ="demo_iframe.htm" name ="iframe_a" > </iframe > <p > <a href ="http://www.runoob.com" target ="iframe_a" > RUNOOB.COM</a > </p >
颜色 html使用的颜色由RGB构成。
颜色值 几种写法:
#ff0000,可以简写为#f00
rgb(255, 0, 0)
rgba(255, 0, 0, .5),最后一个参数为透明度
颜色名:
一般不用颜色名。
脚本 script标签 script标签用于定义脚本。
实例:
1 2 3 <script > document .write("Hello World!" ); </script >
noscript标签 noscript标签提供无法使用脚本时的替代内容,比方在浏览器禁用脚本时,或浏览器不支持客户端脚本时。
只有在浏览器不支持脚本或者禁用脚本时,才会显示noscript元素中的内容:
1 2 3 4 <script > document .write("Hello World!" ) </script > <noscript > 抱歉,你的浏览器不支持 JavaScript!</noscript >
字符实体 html中的预留字符必须被替换为字符实体。
url url(统一资源定位符)是一个网页地址。
浏览器通过url从浏览器请求资源。
url规则:
1 2 scheme://host.domain:port/path/filename 协议://主机.域名:端口/路径/文件名
常见的协议:
http:超文本传输协议,不加密。
https:安全超文本传输协议,加密。
ftp:文件传输协议,上传或下载文件。
file:本机文件。
url编码
速查列表 基本文档 1 2 3 4 5 6 7 8 9 10 11 12 <!DOCTYPE html > <html > <head > <title > 文档标题</title > </head > <body > 可见文本... </body > </html >
基本标签 1 2 3 4 5 6 7 8 9 10 11 <h1 > 最大的标题</h1 > <h2 > . . . </h2 > <h3 > . . . </h3 > <h4 > . . . </h4 > <h5 > . . . </h5 > <h6 > 最小的标题</h6 > <p > 这是一个段落。</p > <br > (换行)<hr > (水平线)
文本格式化 1 2 3 4 5 6 7 8 9 10 11 12 13 14 15 16 17 <b > 粗体文本</b > <code > 计算机代码</code > <em > 强调文本</em > <i > 斜体文本</i > <kbd > 键盘输入</kbd > <pre > 预格式化文本</pre > <small > 更小的文本</small > <strong > 重要的文本</strong > <abbr > (缩写) <address > (联系信息) <bdo > (文字方向) <blockquote > (从另一个源引用的部分) <cite > (工作的名称) <del > (删除的文本) <ins > (插入的文本) <sub > (下标文本) <sup > (上标文本)
链接 1 2 3 4 5 6 普通的链接:<a href ="http://www.example.com/" > 链接文本</a > 图像链接: <a href ="http://www.example.com/" > <img src ="URL" alt ="替换文本" > </a > 邮件链接: <a href ="mailto:webmaster@example.com" > 发送e-mail</a > 书签: <a id ="tips" > 提示部分</a > <a href ="#tips" > 跳到提示部分</a >
图片 1 <img loading ="lazy" src ="URL" alt ="替换文本" height ="42" width ="42" >
内部样式 1 2 3 4 5 6 7 8 9 10 11 <style type ="text/css" > h1 { color: red; } p { color: blue; } </style > <div > 文档中的块级元素</div > <span > 文档中的内联元素</span >
无序列表 1 2 3 4 <ul > <li > 项目</li > <li > 项目</li > </ul >
有序列表 1 2 3 4 <ol > <li > 第一项</li > <li > 第二项</li > </ol >
定义列表 1 2 3 4 5 6 <dl > <dt > 项目 1</dt > <dd > 描述项目 1</dd > <dt > 项目 2</dt > <dd > 描述项目 2</dd > </dl >
表格 1 2 3 4 5 6 7 8 9 10 <table border ="1" > <tr > <th > 表格标题</th > <th > 表格标题</th > </tr > <tr > <td > 表格数据</td > <td > 表格数据</td > </tr > </table >
框架 1 <iframe src ="demo_iframe.htm" > </iframe >
表单 1 2 3 4 5 6 7 8 9 10 11 12 13 14 15 <form action ="demo_form.php" method ="post/get" > <input type ="text" name ="email" size ="40" maxlength ="50" > <input type ="password" > <input type ="checkbox" checked ="checked" > <input type ="radio" checked ="checked" > <input type ="submit" value ="Send" > <input type ="reset" > <input type ="hidden" > <select > <option > 苹果</option > <option selected ="selected" > 香蕉</option > <option > 樱桃</option > </select > <textarea name ="comment" rows ="60" cols ="20" > </textarea > </form >
实体 1 2 3 < 等同于 < > 等同于 > © 等同于 ©
标签速查 https://www.runoob.com/html/html-tag-name.html